接口封装请求
大约 1 分钟
--- title: 接口封装请求 category:
- 前端 tag:
- uniapp
接口封装请求
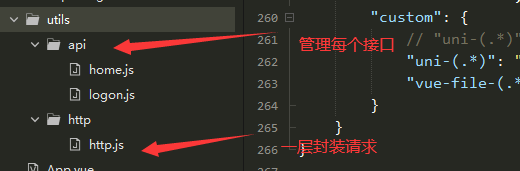
utils>http>http.js文件 一层封装请求
//post和get请求封装
const baseUrl = "XXXXXXXXX"; // 测试环境
const $http = {
	/*
	url 路径地址
	data 传递的数据
	methods 请求类型 POST
	dataType  数据格式转成
	token token数据
	headers  headers头部数据
	*/
	httpRequest: function({
		url,
		data,
		methods,
		dataType,
		token,
		headers
	}) {
		return new Promise(function(resolve, reject) {
			uni.request({
				url: baseUrl + url,
				data: data || {},
				method: methods || "GET",
				dataType: dataType || "JSON",
				header:  {
					"token": uni.getStorageSync('SESSION').token || '',
					"Content-Type": headers || "application/x-www-form-urlencoded"
				},
				success: function(res) {
					// 判断接口是否正常
					if (res.statusCode === 200) {
						// 返回成功后对数据进行处理,这儿返回状态是字符串(根据后端返回为准) 转换

						//需要处理一下,uniapp和小程序返回的不一样
						// #ifdef  APP-PLUS
						var resData = res.data;
						// #endif
						// #ifdef  MP-WEIXIN
						var resData = JSON.parse(res.data);
						// #endif
						if (resData.status === 1) {//接口连接成功调用
							resolve(resData);//走  .tnen()方法
						} else if (resData.status === -1) {//接口连接失败调用
							reject(resData);//走   .catch()方法
						}
					}else{
						uni.hideLoading();
						uni.showToast({
							title: '网络繁忙!',
							icon: 'none',
							duration: 2000
						});
					}
				},
				fail: function(err) {
					uni.hideLoading();
					reject(err);
				}
			})
		})
	}
}
export default $http;
utils>api>logon.js文件 二层封装统一管理接口
// 引入请求js
import config from '@/utils/http/http.js';
// 登录接口统一管理
const $http = {
	//比如说是 login 登录接口,
	getcode:function(params,methods) {
		return config.httpRequest({url: 'Common/GetCode',params,methods})
	}
}
export default $http;
logon.vue文件中调用方法
<script>
	import logon from '@/utils/api/logon.js';
	export default {
		data() {
			return {}
		},
		onLoad() {},
		created() {
			this.getCode()
		},
		methods: {
			getCode() {
				alert(this.logonChecked)
				const self = this;
				let data = {
					state: 6,
					phone: self.phone
				};
				let methods = 'POST';
				logon.getcode(data, methods).then(res => {
					self.title = res;
					console.log(res);
				}).catch((err)=>{
					//如果有需要,个别单独接口可以监听失败操作
				});
			}
		}
	}
</script>
这样就完成了,如果有帮到你,可以点一个赞哦!!!