集成接口管理工具Knife4j
集成接口管理工具Knife4j
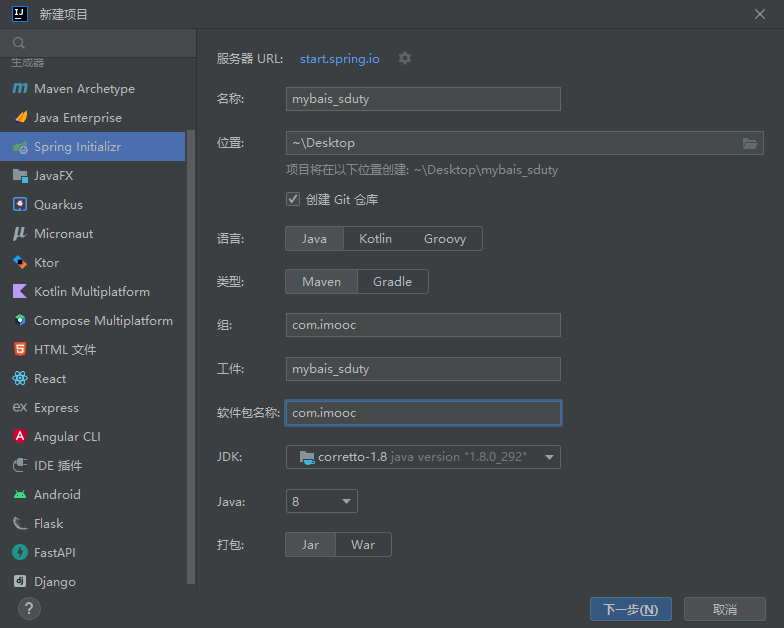
创建 Spring Boot 项目
既然要在 Spring Boot 中使用 Knife4j,那首先就得创建一个 Spring Boot 项目。当然,我在之前已经写过文章介绍如何创建 Spring Boot 项目了,所以这里不再赘述
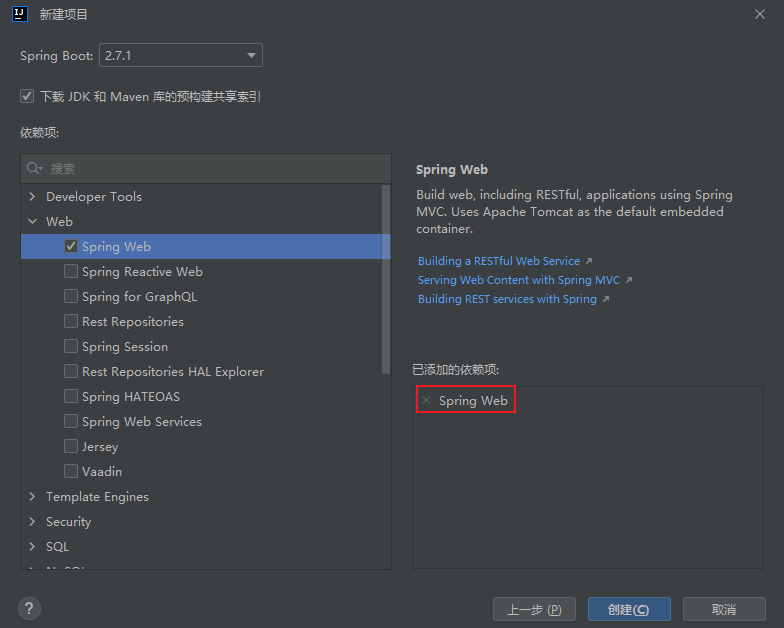
添加依赖
既然是用 Maven 来管理项目依赖,那我们在项目 pom.xml 中引入 Knife4j 的相关依赖包,引入代码如下。
<dependency>
    <groupId>com.github.xiaoymin</groupId>
    <artifactId>knife4j-spring-boot-starter</artifactId>
    <version>3.0.3</version>
</dependency>
配置添加
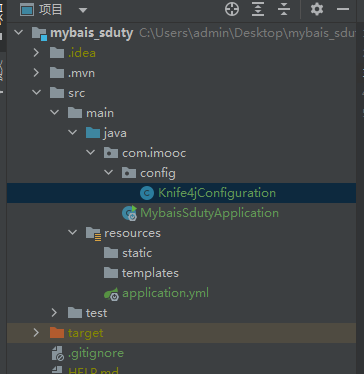
接着在项目中创建一个配置包 config,用于配置 Swagger 的配置依赖。在这里可以配置扫描的 controller 所在的包,设置接口文档的标题、描述、作者信息等。 这里其实和 Swagger2 和 Swagger3 很相似,Swagger 也是可以通过配置类来指定这些信息。
package com.imooc.config;
import com.github.xiaoymin.knife4j.spring.annotations.EnableKnife4j;
import org.springframework.context.annotation.Bean;
import org.springframework.context.annotation.Configuration;
import springfox.documentation.builders.ApiInfoBuilder;
import springfox.documentation.builders.PathSelectors;
import springfox.documentation.builders.RequestHandlerSelectors;
import springfox.documentation.service.ApiInfo;
import springfox.documentation.service.Contact;
import springfox.documentation.spi.DocumentationType;
import springfox.documentation.spring.web.plugins.Docket;
import springfox.documentation.swagger2.annotations.EnableSwagger2;
@Configuration
@EnableSwagger2
@EnableKnife4j
public class Knife4jConfiguration {
@Bean
public Docket createRestApi() {
return new Docket(DocumentationType.SWAGGER_2)
.useDefaultResponseMessages(false)
.apiInfo(apiInfo())
.select() .apis(RequestHandlerSelectors.basePackage("com.imooc.controller"))
.paths(PathSelectors.any())
.build();
}
private ApiInfo apiInfo() {
return new ApiInfoBuilder()
.description("Kinfe4j 集成测试文档")
.contact(new Contact("测试开发", "https://www/JavaPark", "11111@qq.com"))
.version("v1.1.0")
.title("API测试文档")
.build();
}
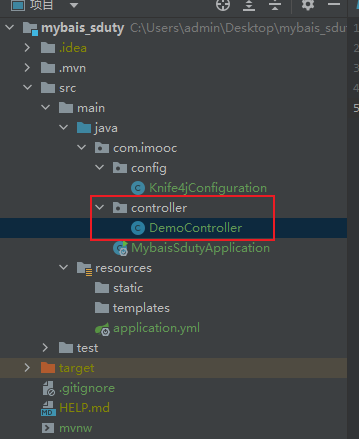
}编写 Controller 层
接着我们编写一个测试的 controller,用于在 Knife4j 中展示用,代码如下。
package com.imooc.controller;

import io.swagger.annotations.Api;
import io.swagger.annotations.ApiImplicitParam;
import io.swagger.annotations.ApiOperation;
import org.springframework.http.ResponseEntity;
import org.springframework.web.bind.annotation.PostMapping;
import org.springframework.web.bind.annotation.RequestParam;
import org.springframework.web.bind.annotation.RestController;

@Api(tags = "测试模块")
@RestController
public class DemoController {
    @ApiImplicitParam(name = "name", value = "姓名", required = true)
    @ApiOperation(value = "入门程序,Hello World")
    @PostMapping("/helloWorld")
    public ResponseEntity<String> helloWorld(@RequestParam(value = "name") String name) {
        return ResponseEntity.ok("Hello World," + name);
    }
}
启动测试
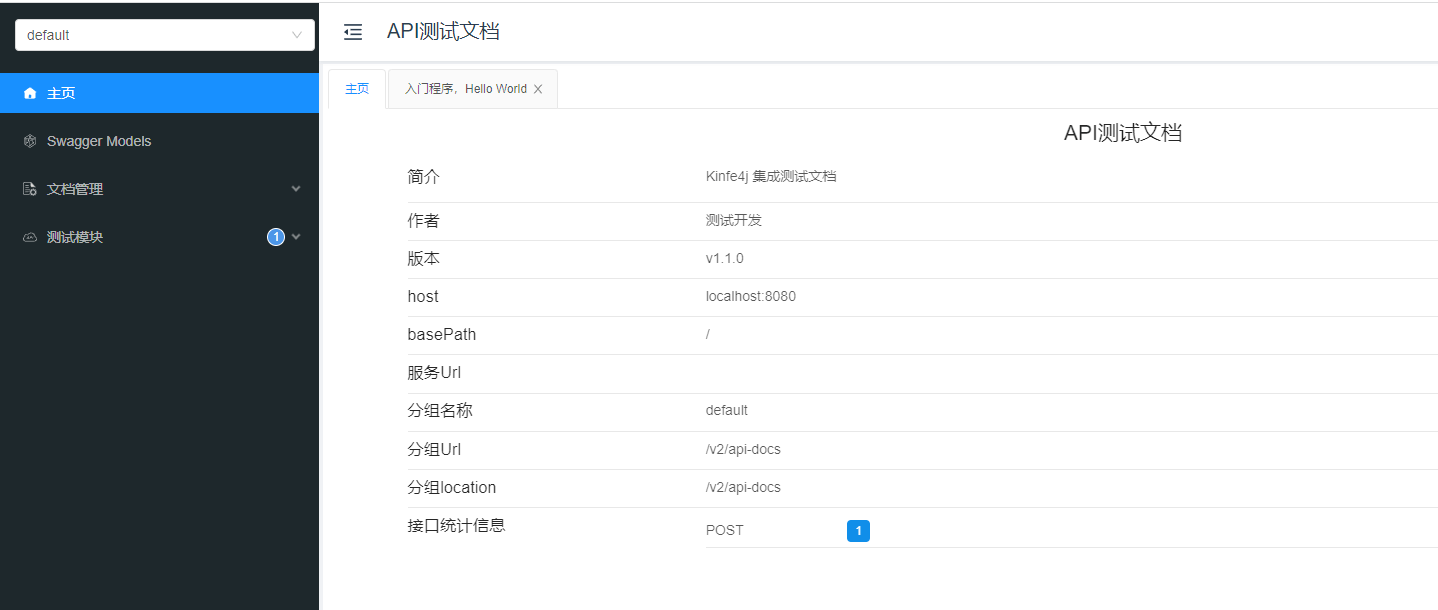
然后将项目启动起来,接着到浏览器中去打开 http://localhost:8080/doc.html,就会出现以下的主界面。这里有我们之前在配置类中所设置的一些接口信息,此外,还对接口进行了统计。因为我们代码中只写了一个 POST 的请求,所以这里统计出只有一个 POST 请求。
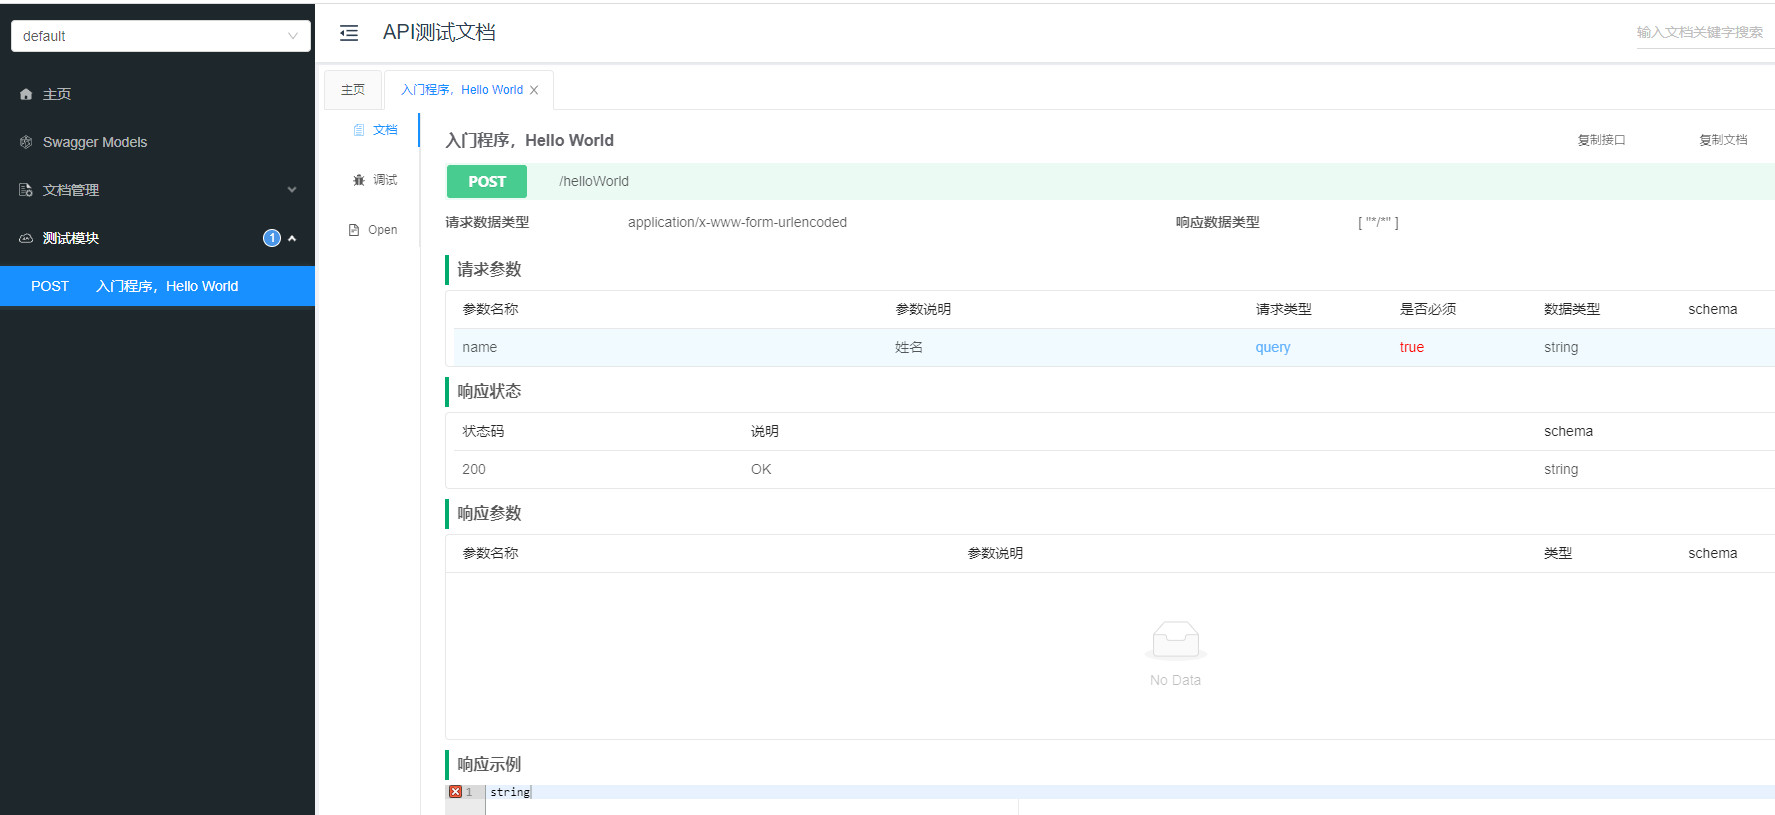
打开具体接口,这里就有我们接口的请求和响应的一些情况说明。
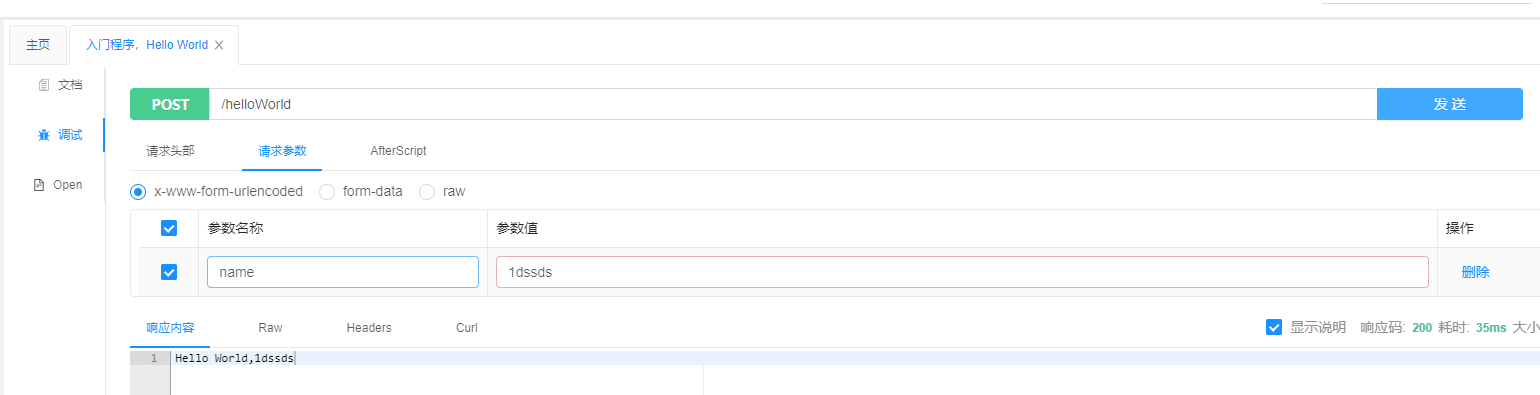
点击左侧 调试 按钮,我们就可以在 Knife4j 中测试我们的接口。
踩过的坑
当然,如果你按照以上步骤顺利打开了 Knife4j 的文档管理页面,那接下来的内容你大可不必了解。但如果你按照上边步骤搭建过程中也出现了问题,那不妨看看以下是否有你遇到的 Bug。
空指针异常
Failed to start bean 'documentationPluginsBootstrapper'; nested exception is java.lang.NullPointerException经过查询资料可知,这是因为 Springfox 使用的路径匹配是基于 AntPathMatcher 的,但是由于我使用的是 Spring Boot 2.6.x 版本,正好这个版本使用的是 PathPatternMatcher,所以才会出现这个问题。所以这里主要可以通过两种方式来解决。 第一种,无可厚非,就是将我们的 Spring Boot 的版本降低,从 2.6.x 降到 2.5.x,此时就应该是可以了,这里可以自己去试一下。 第二种,既然我们都已经用上 2.6.x 版本了,那我们就是不想降低版本咋整。此时,我们只需要在主程序启动类中加上 @EnableWebMvc 这个注解。然后再次启动程序,你就会发现启动成功了!
@EnableWebMvc
@SpringBootApplication
public class MybaisSdutyApplication {

    public static void main(String[] args) {
        SpringApplication.run(MybaisSdutyApplication.class, args);
    }

}
请求路径未找到
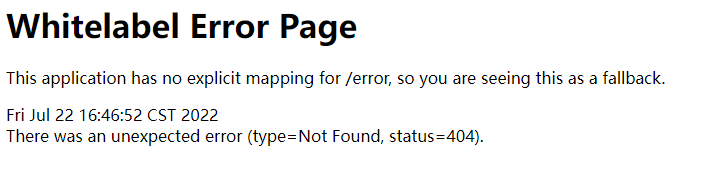
一山放过一山拦,以为翻过了上面的山,就能成功了。没想到出师不利,这不又遇到了报错请求路径未找到。 当我们成功启动项目后,在浏览器中打开 http://localhost:8080/doc.html,却没想到迎接我们的不是成功界面,而是下面的 Whitelabel Error Page
然后到 IDEA 中一看日志,程序照常运行,也没报错,但是给我们抛出了一个 WARN,警告信息如下:
No mapping for GET /doc.html这是因为我们为了解决上面的 Bug 而使用到了 @EnableWebMvc,由于它实现了 WebMvcConfigurer 接口,所以会导致我们访问识别。 这时候问题就来了,上面又需要这个注解,但是下面这个问题又不需要,那该怎么办呢? 其实很简单,既然我们要保留 @EnableWebMvc,那我们去配置个规则不就好了。 在项目的 config 包下,我们新建一个配置类 WebMvcConfigurer 记成 WebMvcConfigurationSupport 类,接着将 dom.html 过滤掉即可。
package com.imooc.config;

import org.springframework.context.annotation.Configuration;
import org.springframework.web.servlet.config.annotation.ResourceHandlerRegistry;
import org.springframework.web.servlet.config.annotation.WebMvcConfigurationSupport;

@Configuration
public class WebMvcConfigurer extends WebMvcConfigurationSupport {
    @Override
    public void addResourceHandlers(ResourceHandlerRegistry registry) {
        registry.addResourceHandler("/**").addResourceLocations("classpath:/static/");
        registry.addResourceHandler("doc.html").addResourceLocations("classpath:/META-INF/resources/");
        registry.addResourceHandler("/webjars/**").addResourceLocations("classpath:/META-INF/resources/webjars/");
        super.addResourceHandlers(registry);
    }
}
完成上述配置后,再去运行项目,再到浏览器中去访问 http://localhost:8080/doc.html 应该就能正常访问 Knife4j 文档管理页面了。
总结
以上就是 Spring Boot 中集成 Knife4j 文档管理工具的内容了,这里主要讲了下如何集成并且进行一个最简单的接口调试,关于更多 Knife4j 的个性化功能,可以去它的官网了解下。 此外,对于文中集成是所遇到的 Bug,如果你没有遇到,那么你应该顺利集成了,如果你也有遇到,那么不妨跟着我去试一下解决的办法。