常用注解
常用注解
1、@SpringBootApplication
这里先单独拎出**@SpringBootApplication** 注解说一下,虽然我们一般不会主动去使用它。
这个注解是 Spring Boot 项目的基石,创建 SpringBoot 项目之后会默认在主类加上。
@SpringBootApplication
public class SpringSecurityJwtGuideApplication {
      public static void main(java.lang.String[] args) {
        SpringApplication.run(SpringSecurityJwtGuideApplication.class, args);
    }
}
我们可以把 @SpringBootApplication看作是 @Configuration、@EnableAutoConfiguration、@ComponentScan 注解的集合。
package org.springframework.boot.autoconfigure;
@Target(ElementType.TYPE)
@Retention(RetentionPolicy.RUNTIME)
@Documented
@Inherited
@SpringBootConfiguration
@EnableAutoConfiguration
@ComponentScan(excludeFilters = {
        @Filter(type = FilterType.CUSTOM, classes = TypeExcludeFilter.class),
        @Filter(type = FilterType.CUSTOM, classes = AutoConfigurationExcludeFilter.class) })
public @interface SpringBootApplication {
   ......
}

package org.springframework.boot;
@Target(ElementType.TYPE)
@Retention(RetentionPolicy.RUNTIME)
@Documented
@Configuration
public @interface SpringBootConfiguration {

}
根据 SpringBoot 官网,这三个注解的作用分别是:
- @EnableAutoConfiguration:启用 SpringBoot 的自动配置机制
- @ComponentScan: 扫描被@Component (@Repository,@Service,@Controller)注解的 bean,注解默认会扫描该类所在的包下所有的类。
- @Configuration:允许在 Spring 上下文中注册额外的 bean 或导入其他配置类
2、Spring Bean 相关
@component
泛指各种组件,就是说当我们的类不属于各种归类的时候(不属于@Controller、@Services等的时候),我们就可以使用@Component来标注这个类。
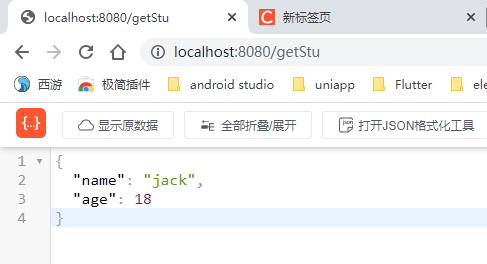
@Configuration
一般用来声明配置类,可以使用 @Component注解替代,不过使用**@Configuration**注解声明配置类更加语义化。
@Configuration
public class AppConfig {
    @Bean
    public TransferService transferService() {
        return new TransferServiceImpl();
    }
}
@Autowired
自动导入对象到类中,被注入进的类同样要被 Spring 容器管理比如:Service 类注入到 Controller 类中。
@Service
public class UserService {
  ......
}

@RestController
@RequestMapping("/users")
public class UserController {
   @Autowired
   private UserService userService;
   ......
}
使用以下注解引入其它类
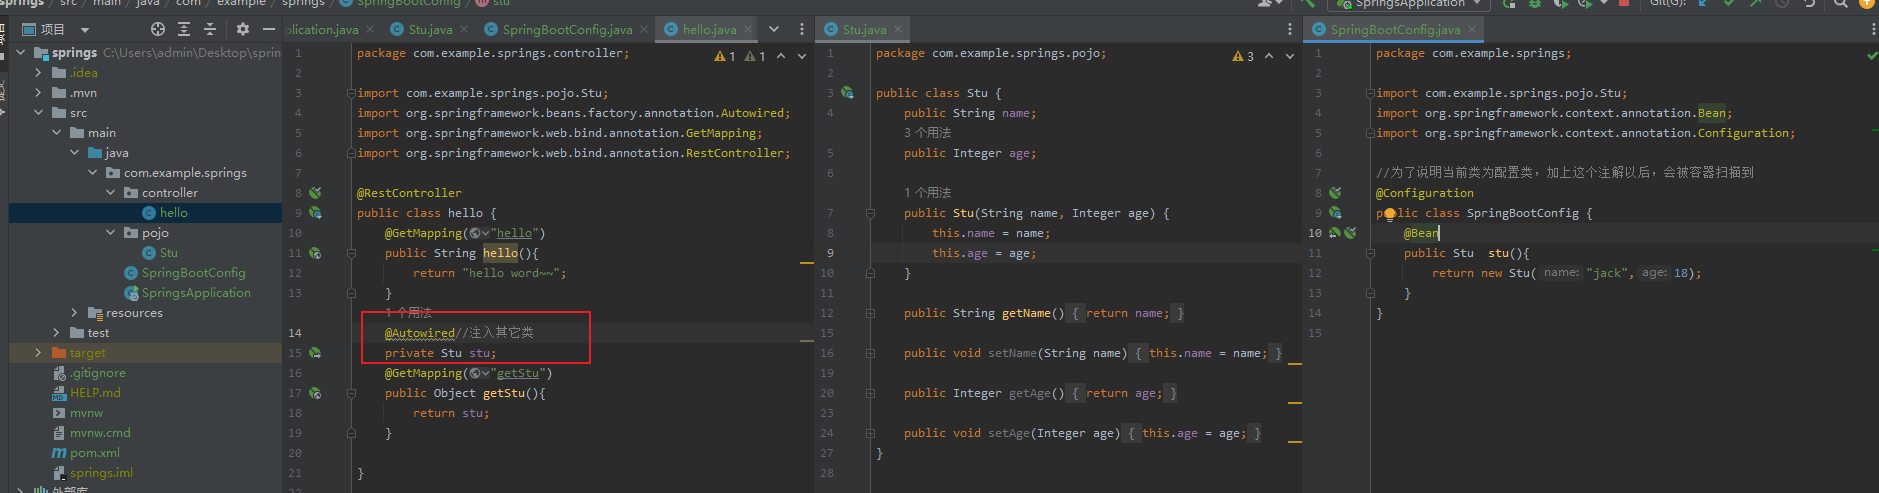
@RequestMapping
可以统一为所有接口加前缀,也可以用到单一接口上使用
@RequestMapping("hello")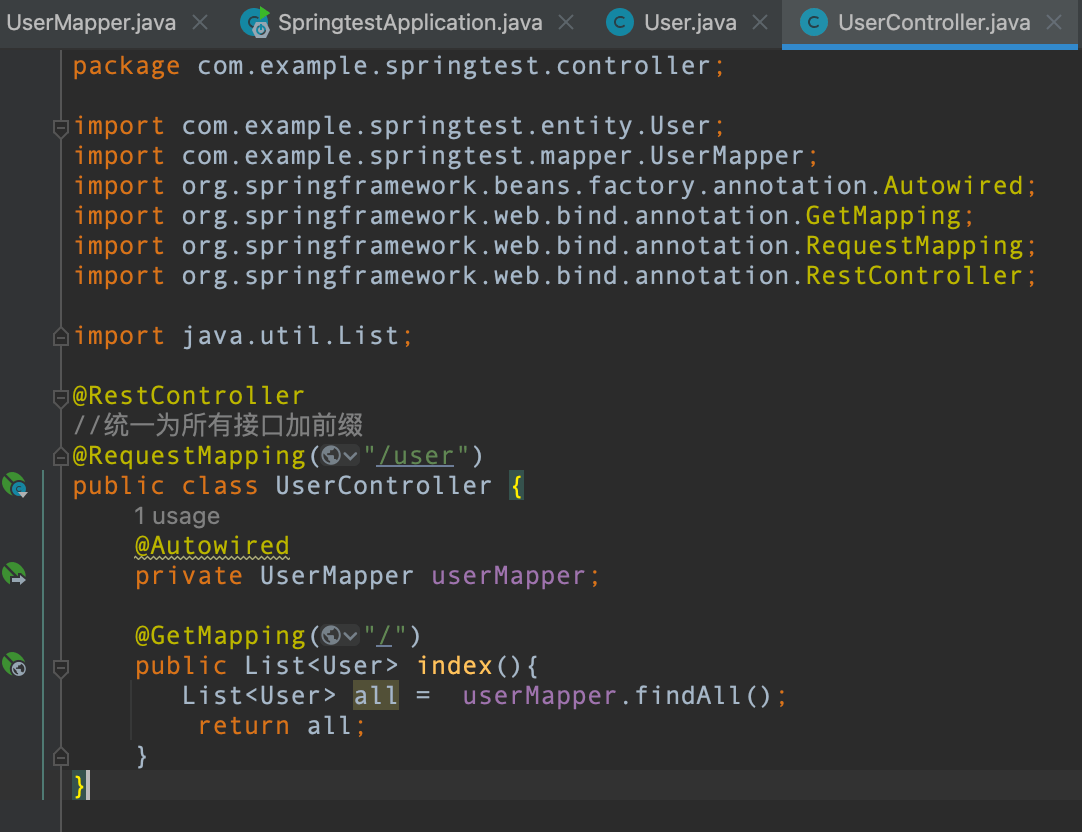
@Repository
@Repository : 对应持久层即 Dao 层,主要用于数据库相关操作。
@Service
@Service : 对应服务层,主要涉及一些复杂的逻辑,需要用到 Dao 层。
@Controller
//表示是Controller层
@Controller
@ResponseBody
//该注解表示返回的值是一个字符串或json
@ResponseBody
@RestController
//该注解表示@Controller和@ResponseBody的结合
@RestController
@Bean配置详解
Bean配置信息定义了Bean的实现及依赖关系,Spring容器根据各种形式的Bean配置信息来创建Bean实例,并调用Bean实例的方法来完成“依赖注入”,可以把Spring容器理解成一个大型工厂,Bean就是该工厂的产品,工厂(Spirng容器)里能生产出来什么样的产品(Bean),完全取决于配置文件中的配置。而这个配置是由开发人员创建和维护的,而在SpringBoot里面已经通过注解来实现,常用的bean注解@Controller,@Service,@Component,@Configuration(bean的配置类)等
@Bean标注在方法
@Bean标注在方法上上(返回某个实例的方法),等价于spring的xml配置文件中的< bean>,作用为:注册bean对象。声明当前方法的返回值是一个 Bean。
@Configuration上注册Bean对象
@Configuration加上@Bean去注册一个bean 对象,这样我们就不用再去写xml文件去注册bean对象。
使用说明
- @Bean 注解作用在方法上
- @Bean 指示一个方法返回一个 Spring 容器管理的 Bean
- @Bean 方法名与返回类名一致,首字母小写
- @Bean 一般和 @Component 或者@Configuration 一起使用
- @Bean 注解默认作用域为单例 singleton 作用域,可通过 @Scope(“prototype”) 设置为原型作用域
Bean 名称
(1)默认情况下 Bean 名称就是方法名,比如下面 Bean 名称便是 myBean:
@Bean
public MyBean myBean(){
    return new MyBean();
}
(2)@Bean 注解可以接受一个 String 数组设置多个别名。比如下面除了主名称 myBean 外,还有别名 myBean1、myBean2(三个都可以使用)
@Bean({"myBean1", "myBean2"})
public MyBean myBean() {
    return new MyBean();
}
Bean 初始化和销毁时调用相应的方法
Spring 对 Bean 的生命周期的操作提供了支持:我们可以通过 @Bean 注解的 initMethod 和 destrodMethod 进行指定 Bean 在初始化和销毁时需要调用相应的方法。
public class MyBean {
    public void init() {
        System.out.println("MyBean开始初始化...");
    }

    public void destroy() {
        System.out.println("MyBean销毁...");
    }

    public String get() {
        return "MyBean使用...";
    }
}

@Bean(initMethod="init", destroyMethod="destroy")
public MyBean myBean() {
   return new MyBean();
}
代码
自定义的配置类 MyConfigration: 使用 @Configration 注解将该类声明为一个配置类。在 hello() 方法上添加 @Bean 注解则会往 Spring 容器中添加一个名为 hello 的 Bean,该 Bean 即为方法的返回值。
package com.example.demo.component;

        import org.springframework.context.annotation.Bean;
        import org.springframework.context.annotation.Configuration;

@Configuration
public class MyConfigration {
    @Bean
    public String hello() {
        return "welcome to hangge.com";
    }
}
在对应的Controller里获取并使用Bean
package com.example.demo.controller;
import org.springframework.beans.factory.annotation.Autowired;
import org.springframework.web.bind.annotation.GetMapping;
import org.springframework.web.bind.annotation.RestController;

@RestController
public class HelloController {

    @Autowired
    String hello;

    @GetMapping("/test")
    public String test() {
        return hello;
    }
}
@Scope
声明 Spring Bean 的作用域,使用方法:
@Bean
@Scope("singleton")
public Person personSingleton() {
    return new Person();
}
四种常见的 Spring Bean 的作用域:
- singleton : 唯一 bean 实例,Spring 中的 bean 默认都是单例的。
- prototype : 每次请求都会创建一个新的 bean 实例。
- request : 每一次 HTTP 请求都会产生一个新的 bean,该 bean 仅在当前 HTTP request 内有效。
- session : 每一个 HTTP Session 会产生一个新的 bean,该 bean 仅在当前 HTTP session 内有效。
3、处理常见的 HTTP 请求类型
5 种常见的请求类型:
- GET :请求从服务器获取特定资源。举个例子:
GET /users(获取所有学生) - POST :在服务器上创建一个新的资源。举个例子:
POST /users(创建学生) - PUT :更新服务器上的资源(客户端提供更新后的整个资源)。举个例子:
PUT /users/12(更新编号为 12 的学生) - DELETE :从服务器删除特定的资源。举个例子:
DELETE /users/12(删除编号为 12 的学生) - PATCH :更新服务器上的资源(客户端提供更改的属性,可以看做作是部分更新),使用的比较少,这里就不举例子了。
GET 请求
@GetMapping("users")` 等价于`@RequestMapping(value="/users",method=RequestMethod.GET)@GetMapping("/users")
public ResponseEntity<List<User>> getAllUsers() {
return userRepository.findAll();
}POST 请求
@PostMapping("users")` 等价于`@RequestMapping(value="/users",method=RequestMethod.POST)关于**@RequestBody**注解的使用,在下面的“前后端传值”这块会讲到。
@PostMapping("/users")
public ResponseEntity<User> createUser(@Valid @RequestBody UserCreateRequest userCreateRequest) {
return userRespository.save(userCreateRequest);
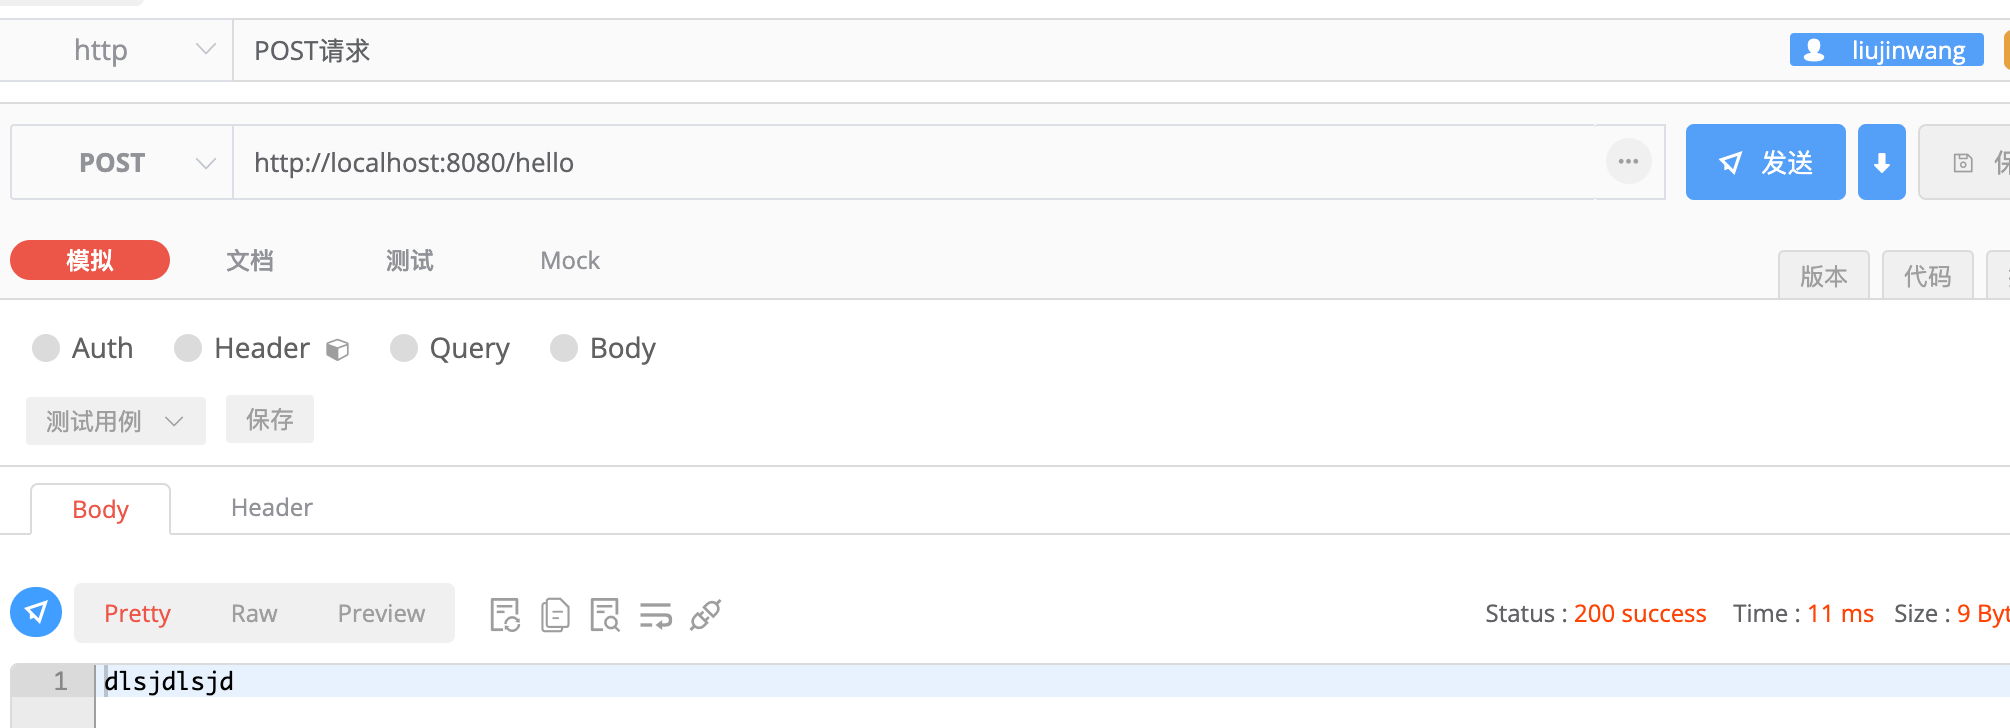
}案例:创建Controller包,再创建HelloController控制器
package com.example.springs.controller;

import org.springframework.web.bind.annotation.PostMapping;
import org.springframework.web.bind.annotation.RestController;

//该注解表示@Controller和@ResponseBody的结合
@RestController
public class HelloController {
    @PostMapping("hello")
    public String hellow(){
        return "dlsjdlsjd";
    }
}
PUT 请求
@PutMapping("/users/{userId}")` 等价于`@RequestMapping(value="/users/{userId}",method=RequestMethod.PUT)@PutMapping("/users/{userId}")
public ResponseEntity<User> updateUser(@PathVariable(value = "userId") Long userId,
@Valid @RequestBody UserUpdateRequest userUpdateRequest) {
......
}DELETE 请求
@DeleteMapping("/users/{userId}")`等价于`@RequestMapping(value="/users/{userId}",method=RequestMethod.DELETE)@DeleteMapping("/users/{userId}")
public ResponseEntity deleteUser(@PathVariable(value = "userId") Long userId){
......
}PATCH 请求
一般实际项目中,我们都是 PUT 不够用了之后才用 PATCH 请求去更新数据。
  @PatchMapping("/profile")
  public ResponseEntity updateStudent(@RequestBody StudentUpdateRequest studentUpdateRequest) {
        studentRepository.updateDetail(studentUpdateRequest);
        return ResponseEntity.ok().build();
    }
4、前后端传值
掌握前后端传值的正确姿势,是你开始 CRUD 的第一步!
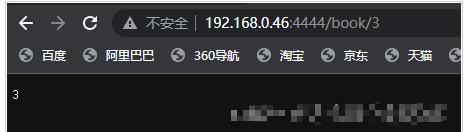
@PathVariable
@PathVariable用于获取路径参数,映射 url 路径中的变量
@RestController
public class BookController {
    @GetMapping("/book/{id}")
    public Integer getBook(@PathVariable("id") Integer id) {
        // 打印参数
        System.out.println(id);
        return id;
    }
}
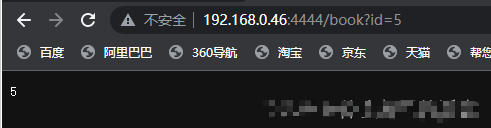
@RequestParam
@RequestParam用于获取查询参数,获取url的参数
@RestController
public class BookController {
    @GetMapping("/book")
    public Integer getBook2(@RequestParam("id") Integer id) {
        // 打印参数
        System.out.println(id);
        return id;
    }
}
@RequestHeader
获取请求头中的参数
@RestController
public class BookController {
    @GetMapping("/ua")
    public String getUA(@RequestHeader("User-Agent") String userAgent) {
        // 打印参数
        System.out.println(userAgent);
        return userAgent;
    }
}
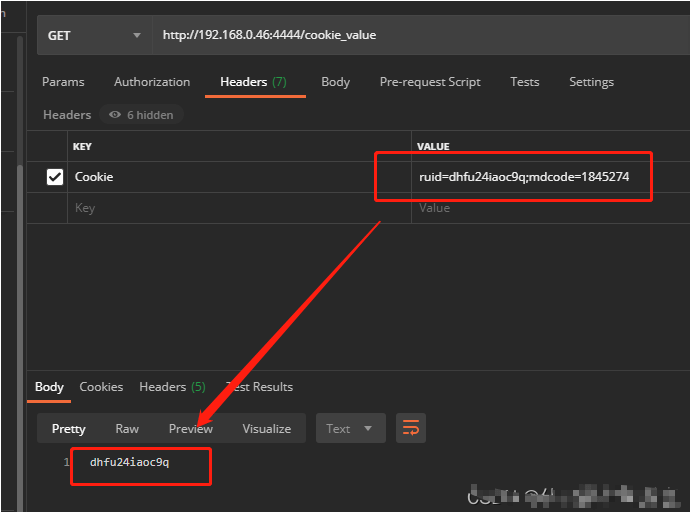
@CookieValue
获取Cookie中的值
@RestController
public class BookController {
    @GetMapping("/cookie_value")
    public String getCV(@CookieValue("ruid") String ruid) {
        // 打印参数
        System.out.println(ruid);
        return ruid;
    }
}
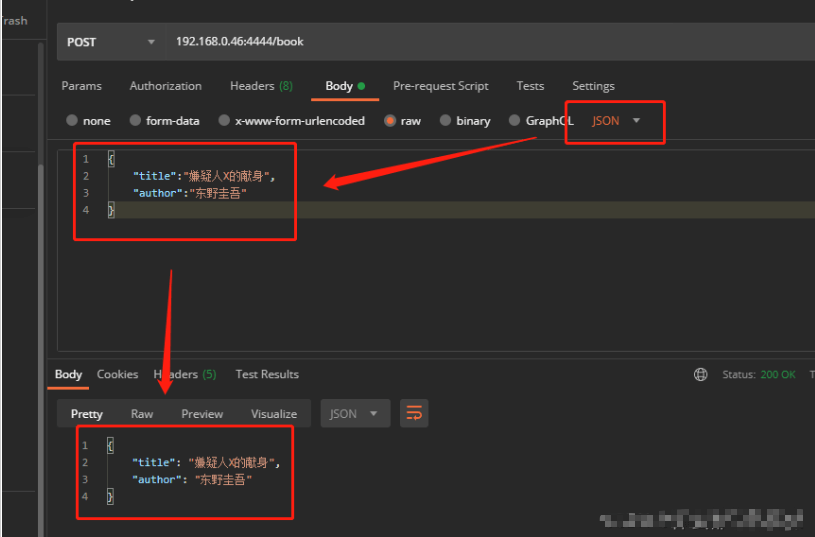
@RequestBody
用于读取 Request 请求(可能是 POST,PUT,DELETE,GET 请求)的 body 部分并且Content-Type 为 application/json 格式的数据,接收到数据之后会自动将数据绑定到 Java 对象上去。系统会使用HttpMessageConverter或者自定义的HttpMessageConverter将请求的 body 中的 json 字符串转换为 java 对象。
@RestController
public class BookController {
    @PostMapping("/book")
    public Book saveBook(@RequestBody Book book) {
        // 打印参数
        System.out.println(book);
        return book;
    }
}
Get请求案例
@PathVariable和@RequestParam两个注解一起使用
package com.example.springs.controller;
import lombok.extern.slf4j.Slf4j;
import org.springframework.web.bind.annotation.*;

@Slf4j
@RequestMapping("stu")
@RestController
public class hello {
    @GetMapping("{stuId}/get")
    public String getStu(@PathVariable("stuId") String stuId, @RequestParam Integer id,@RequestParam String name){
        /*
        * @RequestParam:用于获取url中的请求参数,如果参数变量名保持一致,该注解可以省略
        * */
        log.info("stuId:"+stuId);
        log.info("id:"+id);
        log.info("name:"+name);
        return "查询stu";
    }
}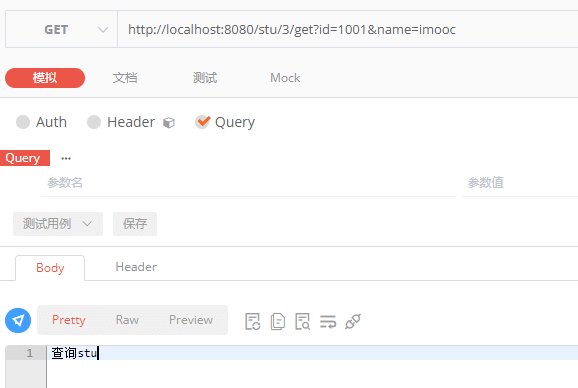
打印

Post请求案例
package com.example.springs.controller;
import lombok.extern.slf4j.Slf4j;
import org.springframework.web.bind.annotation.*;

import javax.servlet.http.HttpServletRequest;
import java.util.Map;

@Slf4j
@RequestMapping("stu")
@RestController
public class hello {
    @PostMapping("create")
    public  String createStu(@RequestBody Map<String,Object> map,
                             @RequestHeader("token") String token,
                             @CookieValue("clientId") String clientId,
                             HttpServletRequest request){
        log.info("token="+token);
        log.info("clientId="+clientId);
        log.info("map="+map.toString());

        String headerToken = request.getHeader("token");
        log.info("headerToken="+headerToken);

        return "新增Stu";
    }
}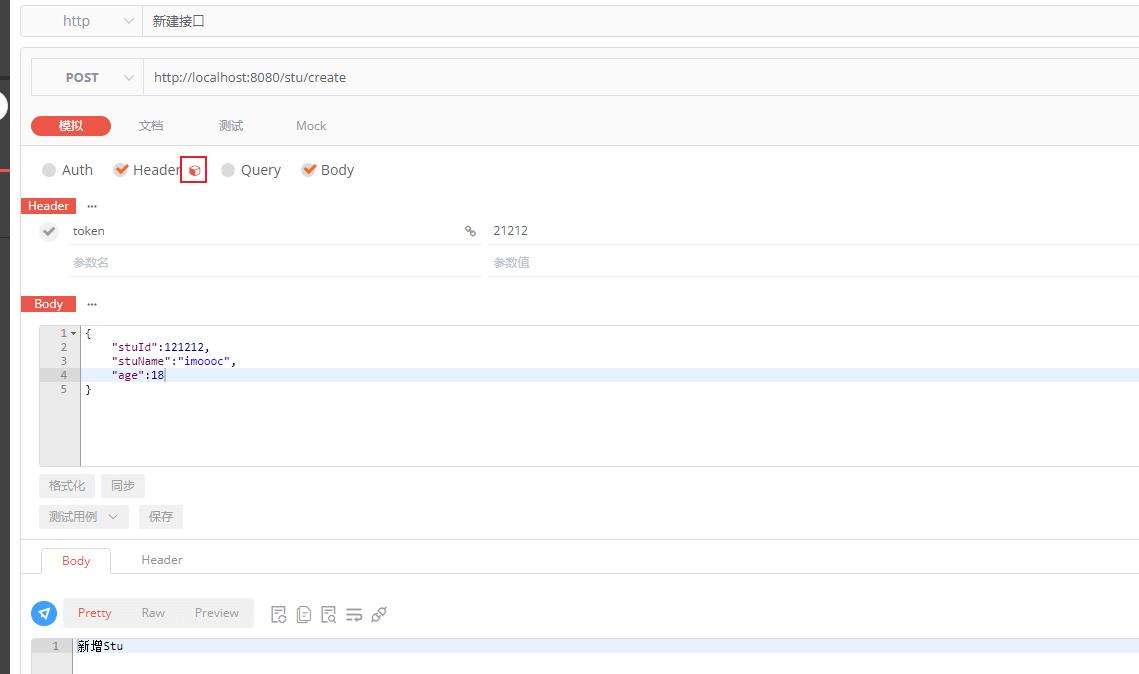
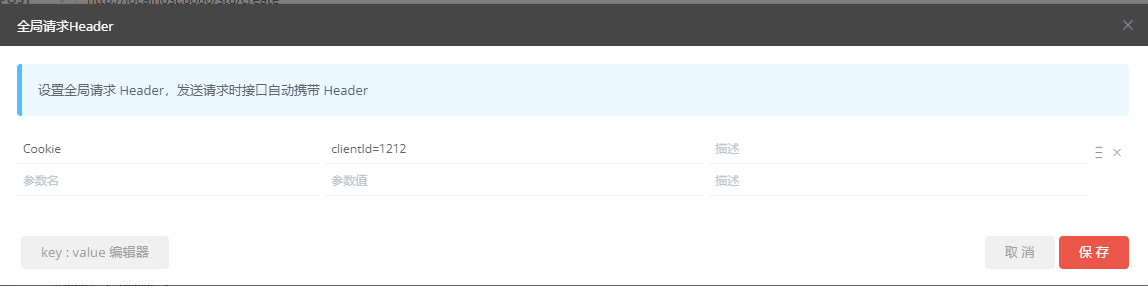
配置Cookie
打印

5、读取配置信息
很多时候我们需要将一些常用的配置信息比如阿里云 oss、发送短信、微信认证的相关配置信息等等放到配置文件中。
下面我们来看一下 Spring 为我们提供了哪些方式帮助我们从配置文件中读取这些配置信息。
我们的数据源application.yml内容如下:
wuhan2020: 2020年初武汉爆发了新型冠状病毒,疫情严重,但是,我相信一切都会过去!武汉加油!中国加油!

my-profile:
  name: Guide哥
  email: koushuangbwcx@163.com

library:
  location: 湖北武汉加油中国加油
  books:
    - name: 天才基本法
      description: 二十二岁的林朝夕在父亲确诊阿尔茨海默病这天,得知自己暗恋多年的校园男神裴之即将出国深造的消息——对方考取的学校,恰是父亲当年为她放弃的那所。
    - name: 时间的秩序
      description: 为什么我们记得过去,而非未来?时间“流逝”意味着什么?是我们存在于时间之内,还是时间存在于我们之中?卡洛·罗韦利用诗意的文字,邀请我们思考这一亘古难题——时间的本质。
    - name: 了不起的我
      description: 如何养成一个新习惯?如何让心智变得更成熟?如何拥有高质量的关系? 如何走出人生的艰难时刻?
@Value(常用)
使用 @Value("${property}") 读取比较简单的配置信息:
@Value("${wuhan2020}")
String wuhan2020;
@ConfigurationProperties(常用)
通过**@ConfigurationProperties**读取配置信息并与 bean 绑定。
@Component
@ConfigurationProperties(prefix = "library")
class LibraryProperties {
    @NotEmpty
    private String location;
    private List<Book> books;

    @Setter
    @Getter
    @ToString
    static class Book {
        String name;
        String description;
    }
  省略getter/setter
  ......
}
你可以像使用普通的 Spring bean 一样,将其注入到类中使用。
@PropertySource(不常用)
@PropertySource读取指定 properties 文件
@Component
@PropertySource("classpath:website.properties")

class WebSite {
    @Value("${url}")
    private String url;

  省略getter/setter
  ......
}
6、参数校验
数据的校验的重要性就不用说了,即使在前端对数据进行校验的情况下,我们还是要对传入后端的数据再进行一遍校验,避免用户绕过浏览器直接通过一些 HTTP 工具直接向后端请求一些违法数据。
JSR(Java Specification Requests) 是一套 JavaBean 参数校验的标准,它定义了很多常用的校验注解,我们可以直接将这些注解加在我们 JavaBean 的属性上面,这样就可以在需要校验的时候进行校验了,非常方便!
校验的时候我们实际用的是 Hibernate Validator 框架。Hibernate Validator 是 Hibernate 团队最初的数据校验框架,Hibernate Validator 4.x 是 Bean Validation 1.0(JSR 303)的参考实现,Hibernate Validator 5.x 是 Bean Validation 1.1(JSR 349)的参考实现,目前最新版的 Hibernate Validator 6.x 是 Bean Validation 2.0(JSR 380)的参考实现。
如果开发普通 Java 程序的的话,你需要可能需要像下面这样依赖:
	<dependency>
            <groupId>org.hibernate.validator</groupId>
            <artifactId>hibernate-validator</artifactId>
            <version>6.0.9.Final</version>
   </dependency>
   <dependency>
             <groupId>javax.el</groupId>
             <artifactId>javax.el-api</artifactId>
             <version>3.0.0</version>
     </dependency>
     <dependency>
            <groupId>org.glassfish.web</groupId>
            <artifactId>javax.el</artifactId>
            <version>2.2.6</version>
     </dependency>
使用 Spring Boot 程序的话只需要spring-boot-starter-web 就够了,它的子依赖包含了我们所需要的东西。除了这个依赖,下面的演示还用到了 lombok ,所以不要忘记添加上相关依赖。
	<dependencies>
        <dependency>
            <groupId>org.springframework.boot</groupId>
            <artifactId>spring-boot-starter-web</artifactId>
        </dependency>
        <dependency>
            <groupId>org.projectlombok</groupId>
            <artifactId>lombok</artifactId>
            <optional>true</optional>
        </dependency>
        <dependency>
            <groupId>org.springframework.boot</groupId>
            <artifactId>spring-boot-starter-test</artifactId>
            <scope>test</scope>
        </dependency>
    </dependencies>
一些常用的字段验证的注解
JSR提供的校验注解:
@NotEmpty被注释的字符串的不能为 null 也不能为空@NotBlank被注释的字符串非 null,并且必须包含一个非空白字符@Null被注释的元素必须为 null@NotNull被注释的元素必须不为 null@AssertTrue被注释的元素必须为 true@AssertFalse被注释的元素必须为 false@Pattern(regex=,flag=)被注释的元素必须符合指定的正则表达式@Email被注释的元素必须是 Email 格式。@Min(value)被注释的元素必须是一个数字,其值必须大于等于指定的最小值@Max(value)被注释的元素必须是一个数字,其值必须小于等于指定的最大值@DecimalMin(value)被注释的元素必须是一个数字,其值必须大于等于指定的最小值@DecimalMax(value)被注释的元素必须是一个数字,其值必须小于等于指定的最大值@Size(max=, min=)被注释的元素的大小必须在指定的范围内@Digits (integer, fraction)被注释的元素必须是一个数字,其值必须在可接受的范围内@Past被注释的元素必须是一个过去的日期@Future被注释的元素必须是一个将来的日期
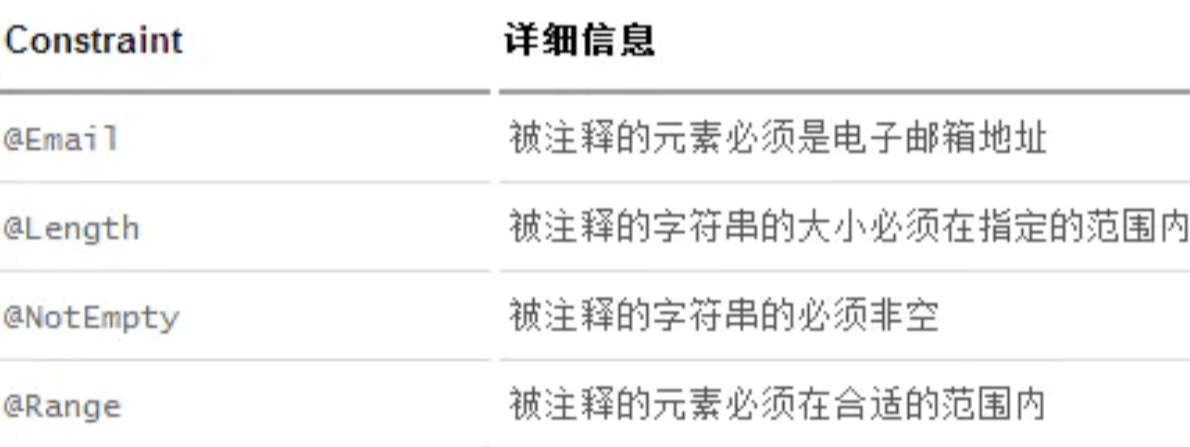
Hibernate Validator提供的校验注解:
@NotBlank(message =)验证字符串非null,且长度必须大于0@Email被注释的元素必须是电子邮箱地址@Length(min=,max=)被注释的字符串的大小必须在指定的范围内@NotEmpty被注释的字符串的必须非空@Range(min=,max=,message=)被注释的元素必须在合适的范围内
实体类
下面这个是示例用到的实体类。
@Data
@AllArgsConstructor
@NoArgsConstructor
publicclass Person {

    @NotNull(message = "classId 不能为空")
    private String classId;

    @Size(max = 33)
    @NotNull(message = "name 不能为空")
    private String name;

    @Pattern(regexp = "((^Man$|^Woman$|^UGM$))", message = "sex 值不在可选范围")
    @NotNull(message = "sex 不能为空")
    private String sex;

    @Email(message = "email 格式不正确")
    @NotNull(message = "email 不能为空")
    private String email;

}
正则表达式说明:
- ^string : 匹配以 string 开头的字符串
- string$ :匹配以 string 结尾的字符串
- ^string$ :精确匹配 string 字符串
- ((^Man$|^Woman$|^UGM$)) : 值只能在 Man,Woman,UGM 这三个值中选择
验证请求体(RequestBody)
Controller:
我们在需要验证的参数上加上了**@Valid注解,如果验证失败,它将抛出MethodArgumentNotValidException**。默认情况下,Spring会将此异常转换为HTTP Status 400(错误请求)。
@RestController
@RequestMapping("/api")
publicclass PersonController {

    @PostMapping("/person")
    public ResponseEntity<Person> getPerson(@RequestBody @Valid Person person) {
        return ResponseEntity.ok().body(person);
    }
}
ExceptionHandler:
自定义异常处理器可以帮助我们捕获异常,并进行一些简单的处理。如果对于下面的处理异常的代码不太理解的话,可以查看这篇文章《如何在 Spring/Spring Boot 中做参数校验?你需要了解的都在这里!open in new window》
@ControllerAdvice(assignableTypes = {PersonController.class})
publicclass GlobalExceptionHandler {
    @ExceptionHandler(MethodArgumentNotValidException.class)
    public ResponseEntity<Map<String, String>> handleValidationExceptions(
            MethodArgumentNotValidException ex) {
        Map<String, String> errors = new HashMap<>();
        ex.getBindingResult().getAllErrors().forEach((error) -> {
            String fieldName = ((FieldError) error).getField();
            String errorMessage = error.getDefaultMessage();
            errors.put(fieldName, errorMessage);
        });
        return ResponseEntity.status(HttpStatus.BAD_REQUEST).body(errors);
    }
}
验证请求参数(Path Variables 和 Request Parameters)
Controller:
一定一定不要忘记在类上加上 @Validated 注解了,这个参数可以告诉 Spring 去校验方法参数。
@RestController
@RequestMapping("/api")
@Validated
publicclass PersonController {

    @GetMapping("/person/{id}")
    public ResponseEntity<Integer> getPersonByID(@Valid @PathVariable("id") @Max(value = 5,message = "超过 id 的范围了") Integer id) {
        return ResponseEntity.ok().body(id);
    }
}
👉 需要注意的是: 所有的注解,推荐使用 JSR 注解,即javax.validation.constraints,而不是org.hibernate.validator.constraints
7、JPA相关
创建表
@Entity声明一个类对应一个数据库实体。
@Table 设置表名
@Entity
@Table(name = "role")
public class Role {
    @Id
    @GeneratedValue(strategy = GenerationType.IDENTITY)
    private Long id;
    private String name;
    private String description;
    省略getter/setter......
}
创建主键
@Id :声明一个字段为主键。
使用**@Id**声明之后,我们还需要定义主键的生成策略。我们可以使用 @GeneratedValue 指定主键生成策略。
1.通过 @GeneratedValue直接使用 JPA 内置提供的四种主键生成策略来指定主键生成策略。
@Id
@GeneratedValue(strategy = GenerationType.IDENTITY)
private Long id;
JPA 使用枚举定义了 4 种常见的主键生成策略,如下:
public enum GenerationType {

    /**
     * 使用一个特定的数据库表格来保存主键
     * 持久化引擎通过关系数据库的一张特定的表格来生成主键,
     */
    TABLE,

    /**
     *在某些数据库中,不支持主键自增长,比如Oracle、PostgreSQL其提供了一种叫做"序列(sequence)"的机制生成主键
     */
    SEQUENCE,

    /**
     * 主键自增长
     */
    IDENTITY,

    /**
     *把主键生成策略交给持久化引擎(persistence engine),
     *持久化引擎会根据数据库在以上三种主键生成 策略中选择其中一种
     */
    AUTO
}@GeneratedValue`注解默认使用的策略是`GenerationType.AUTOpublic @interface GeneratedValue {
GenerationType strategy() default AUTO;
String generator() default "";
}一般使用 MySQL 数据库的话,使用GenerationType.IDENTITY策略比较普遍一点(分布式系统的话需要另外考虑使用分布式 ID)。
2.通过 @GenericGenerator声明一个主键策略,然后 @GeneratedValue使用这个策略
@Id
@GeneratedValue(generator = "IdentityIdGenerator")
@GenericGenerator(name = "IdentityIdGenerator", strategy = "identity")
private Long id;
等价于:
@Id
@GeneratedValue(strategy = GenerationType.IDENTITY)
private Long id;
jpa 提供的主键生成策略有如下几种:
public class DefaultIdentifierGeneratorFactory
        implements MutableIdentifierGeneratorFactory, Serializable, ServiceRegistryAwareService {

    @SuppressWarnings("deprecation")
    public DefaultIdentifierGeneratorFactory() {
        register( "uuid2", UUIDGenerator.class );
        register( "guid", GUIDGenerator.class );            // can be done with UUIDGenerator + strategy
        register( "uuid", UUIDHexGenerator.class );         // "deprecated" for new use
        register( "uuid.hex", UUIDHexGenerator.class );     // uuid.hex is deprecated
        register( "assigned", Assigned.class );
        register( "identity", IdentityGenerator.class );
        register( "select", SelectGenerator.class );
        register( "sequence", SequenceStyleGenerator.class );
        register( "seqhilo", SequenceHiLoGenerator.class );
        register( "increment", IncrementGenerator.class );
        register( "foreign", ForeignGenerator.class );
        register( "sequence-identity", SequenceIdentityGenerator.class );
        register( "enhanced-sequence", SequenceStyleGenerator.class );
        register( "enhanced-table", TableGenerator.class );
    }

    public void register(String strategy, Class generatorClass) {
        LOG.debugf( "Registering IdentifierGenerator strategy [%s] -> [%s]", strategy, generatorClass.getName() );
        final Class previous = generatorStrategyToClassNameMap.put( strategy, generatorClass );
        if ( previous != null ) {
            LOG.debugf( "    - overriding [%s]", previous.getName() );
        }
    }

}
设置字段类型
@Column 声明字段。
示例:
设置属性 userName 对应的数据库字段名为 user_name,长度为 32,非空
@Column(name = "user_name", nullable = false, length=32)
private String userName;
设置字段类型并且加默认值,这个还是挺常用的。
@Column(columnDefinition = "tinyint(1) default 1")
private Boolean enabled;
指定不持久化特定字段
@Transient :声明不需要与数据库映射的字段,在保存的时候不需要保存进数据库 。
如果我们想让secrect 这个字段不被持久化,可以使用 @Transient关键字声明。
@Entity(name="USER")
public class User {

    ......
    @Transient
    private String secrect; // not persistent because of @Transient

}
除了 @Transient关键字声明, 还可以采用下面几种方法:
static String secrect; // not persistent because of static
final String secrect = "Satish"; // not persistent because of final
transient String secrect; // not persistent because of transient
一般使用注解的方式比较多。
声明大字段
@Lob:声明某个字段为大字段。
@Lob
private String content;
更详细的声明:
@Lob
//指定 Lob 类型数据的获取策略, FetchType.EAGER 表示非延迟加载,而 FetchType.LAZY 表示延迟加载 ;
@Basic(fetch = FetchType.EAGER)
//columnDefinition 属性指定数据表对应的 Lob 字段类型
@Column(name = "content", columnDefinition = "LONGTEXT NOT NULL")
private String content;
创建枚举类型的字段
可以使用枚举类型的字段,不过枚举字段要用**@Enumerated**注解修饰。
public enum Gender {
    MALE("男性"),
    FEMALE("女性");

    private String value;
    Gender(String str){
        value=str;
    }
}@Entity
@Table(name = "role")
public class Role {
@Id
@GeneratedValue(strategy = GenerationType.IDENTITY)
private Long id;
private String name;
private String description;
@Enumerated(EnumType.STRING)
private Gender gender;
省略getter/setter......
}数据库里面对应存储的是 MALE/FEMALE。
增加审计功能
只要继承了 AbstractAuditBase的类都会默认加上下面四个字段。
@Data
@AllArgsConstructor
@NoArgsConstructor
@MappedSuperclass
@EntityListeners(value = AuditingEntityListener.class)
public abstract class AbstractAuditBase {

    @CreatedDate
    @Column(updatable = false)
    @JsonIgnore
    private Instant createdAt;

    @LastModifiedDate
    @JsonIgnore
    private Instant updatedAt;

    @CreatedBy
    @Column(updatable = false)
    @JsonIgnore
    private String createdBy;

    @LastModifiedBy
    @JsonIgnore
    private String updatedBy;
}
我们对应的审计功能对应地配置类可能是下面这样的(Spring Security 项目):
@Configuration
@EnableJpaAuditing
public class AuditSecurityConfiguration {
    @Bean
    AuditorAware<String> auditorAware() {
        return () -> Optional.ofNullable(SecurityContextHolder.getContext())
                .map(SecurityContext::getAuthentication)
                .filter(Authentication::isAuthenticated)
                .map(Authentication::getName);
    }
}
简单介绍一下上面涉及到的一些注解:
- @CreatedDate: 表示该字段为创建时间字段,在这个实体被 insert 的时候,会设置值
- @CreatedBy :表示该字段为创建人,在这个实体被 insert 的时候,会设置值 @LastModifiedDate、@LastModifiedBy同理。
- @EnableJpaAuditing:开启 JPA 审计功能。
删除/修改数据
@Modifying 注解提示 JPA 该操作是修改操作,注意还要配合**@Transactional**注解使用。
@Repository
public interface UserRepository extends JpaRepository<User, Integer> {

    @Modifying
    @Transactional(rollbackFor = Exception.class)
    void deleteByUserName(String userName);
}
关联关系
@OneToOne 声明一对一关系
@OneToMany 声明一对多关系
@ManyToOne 声明多对一关系
@ManyToMany 声明多对多关系
事务 @Transactional
在要开启事务的方法上使用**@Transactional**注解即可!
@Transactional(rollbackFor = Exception.class)
public void save() {
  ......
}
我们知道 Exception 分为运行时异常 RuntimeException 和非运行时异常。在**@Transactional注解中如果不配置rollbackFor属性,那么事务只会在遇到RuntimeException的时候才会回滚,加上rollbackFor=Exception.class**,可以让事务在遇到非运行时异常时也回滚。 @Transactional 注解一般可以作用在类或者方法上。
作用于类:当把**@Transactional** 注解放在类上时,表示所有该类的 public 方法都配置相同的事务属性信息。 作用于方法:当类配置了**@Transactional**,方法也配置了**@Transactional**,方法的事务会覆盖类的事务配置信息。
我们知道 Exception 分为运行时异常 RuntimeException 和非运行时异常。在@Transactional注解中如果不配置rollbackFor属性,那么事务只会在遇到RuntimeException的时候才会回滚,加上rollbackFor=Exception.class,可以让事务在遇到非运行时异常时也回滚。
@Transactional 注解一般可以作用在类或者方法上。
- 作用于类:当把
@Transactional注解放在类上时,表示所有该类的 public 方法都配置相同的事务属性信息。 - 作用于方法:当类配置了
@Transactional,方法也配置了@Transactional,方法的事务会覆盖类的事务配置信息。
json 数据处理
过滤 json 数据
@JsonIgnoreProperties 作用在类上用于过滤掉特定字段不返回或者不解析。
//生成json时将userRoles属性过滤
@JsonIgnoreProperties({"userRoles"})
public class User {

    private String userName;
    private String fullName;
    private String password;
    private List<UserRole> userRoles = new ArrayList<>();
}@JsonIgnore一般用于类的属性上,作用和上面的**@JsonIgnoreProperties** 一样。
public class User {

    private String userName;
    private String fullName;
    private String password;
   //生成json时将userRoles属性过滤
    @JsonIgnore
    private List<UserRole> userRoles = new ArrayList<>();
}
格式化 json 数据
@JsonFormat一般用来格式化 json 数据。
@JsonFormat(shape=JsonFormat.Shape.STRING, pattern="yyyy-MM-dd'T'HH:mm:ss.SSS'Z'", timezone="GMT")
private Date date;
扁平化对象
@Getter
@Setter
@ToString
public class Account {
    private Location location;
    private PersonInfo personInfo;

  @Getter
  @Setter
  @ToString
  public static class Location {
     private String provinceName;
     private String countyName;
  }
  @Getter
  @Setter
  @ToString
  public static class PersonInfo {
    private String userName;
    private String fullName;
  }
}
未扁平化之前:
{
    "location": {
        "provinceName":"湖北",
        "countyName":"武汉"
    },
    "personInfo": {
        "userName": "coder1234",
        "fullName": "shaungkou"
    }
}
使用**@JsonUnwrapped** 扁平对象之后:
@Getter
@Setter
@ToString
public class Account {
    @JsonUnwrapped
    private Location location;
    @JsonUnwrapped
    private PersonInfo personInfo;
    ......
}
{
"provinceName":"湖北",
"countyName":"武汉",
"userName": "coder1234",
"fullName": "shaungkou"
}测试相关
@ActiveProfiles一般作用于测试类上, 用于声明生效的 Spring 配置文件。
@SpringBootTest(webEnvironment = RANDOM_PORT)
@ActiveProfiles("test")
@Slf4j
public abstract class TestBase {
  ......
}@Test声明一个方法为测试方法
@Transactional被声明的测试方法的数据会回滚,避免污染测试数据。
@WithMockUser Spring Security 提供的,用来模拟一个真实用户,并且可以赋予权限。
    @Test
    @Transactional
    @WithMockUser(username = "user-id-18163138155", authorities = "ROLE_TEACHER")
    void should_import_student_success() throws Exception {
        ......
    }