中间件
中间件
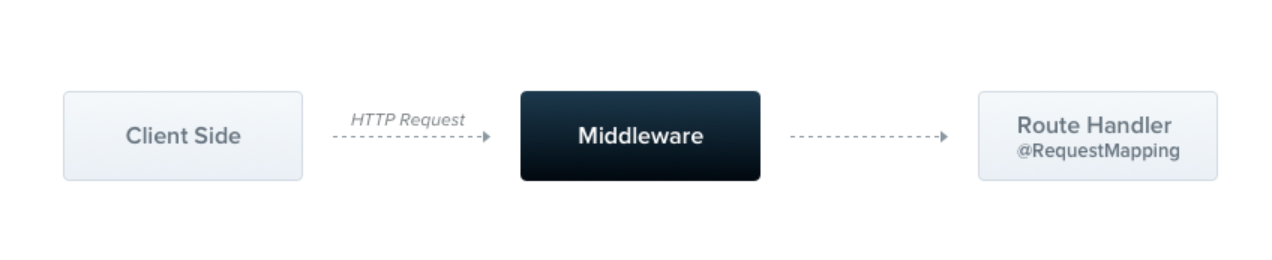
中间件是在路由处理程序之前调用的函数。中间件函数可以访问 request 和 response 对象,以及应用请求-响应周期中的 next() 中间件函数。下一个中间件函数通常由名为 next 的变量表示。
你可以在函数中或在具有 @Injectable() 装饰器的类中实现自定义 Nest 中间件。类应实现 NestMiddleware 接口,功能无特殊要求。让我们从使用类方法实现一个简单的中间件函数开始。
注意
Express 和 fastify 以不同方式处理中间件并提供不同的方法签名
接下来我先创建一个logger.middleware.ts中间件文件
// logger.middleware.ts
import { Injectable, NestMiddleware } from '@nestjs/common';
import { Request, Response, NextFunction } from 'express';

@Injectable()
export class LoggerMiddleware implements NestMiddleware {
  use(req: Request, res: Response, next: NextFunction) {
    console.log('Request...');
    next();
  }
}
注意:如果不调用next 程序将被挂起
依赖注入
Nest 中间件完全支持依赖注入。就像提供器和控制器一样,它们能够注入同一模块中可用的依赖。像往常一样,这是通过 constructor 完成的。
应用中间件
@Module() 装饰器中没有中间件的位置。相反,我们使用模块类的 configure() 方法设置它们。包含中间件的模块必须实现 NestModule 接口。让我们在 AppModule 级别设置 LoggerMiddleware
// app.module.ts
import { MiddlewareConsumer, Module, NestModule } from '@nestjs/common';
import { AppController } from './app.controller';
import { AppService } from './app.service';
// 引入中间件文件
import { LoggerMiddleware } from './logger.middleware';

@Module({
  imports: [],
  controllers: [AppController],
  providers: [AppService],
})
export class AppModule implements NestModule {
  configure(consumer: MiddlewareConsumer) {
    consumer
      .apply(LoggerMiddleware)
      // 这里指定了 路径是/cats ,这个中间件才会生效执行
      .forRoutes('cats');
  }
}调用路径:http://127.0.0.1:3000/cats 然后控制台就打开如下:
Request...在上面的示例中,我们为之前在 AppController 中定义的 /cats 路由处理程序设置了 LoggerMiddleware。我们还可以通过在配置中间件时将包含路由 path 和请求 method 的对象传递给 forRoutes() 方法,进一步将中间件限制为特定的请求方法。在下面的示例中,请注意我们导入了 RequestMethod 枚举以引用所需的请求方法类型。
// app.module.ts
import { MiddlewareConsumer, Module, NestModule, RequestMethod } from '@nestjs/common';
import { AppController } from './app.controller';
import { AppService } from './app.service';
// 引入中间件文件
import { LoggerMiddleware } from './logger.middleware';

@Module({
  imports: [],
  controllers: [AppController],
  providers: [AppService],
})
export class AppModule implements NestModule {
  configure(consumer: MiddlewareConsumer) {
    consumer
      .apply(LoggerMiddleware)
      // 这里指定了 路径是/cats 并且是get请求,这个中间件才会生效执行
      .forRoutes({ path: 'cats', method: RequestMethod.GET });
  }
}
提示
可以使用 async/await 使 configure() 方法异步(例如,你可以在 configure() 方法主体内 await 完成异步操作)
路由通配符
也支持基于模式的路由。例如,星号用作通配符,将匹配任意字符组合
forRoutes({ path: 'ab*cd', method: RequestMethod.ALL });'ab*cd' 路由路径将匹配 abcd、ab_cd、abecd 等。字符 ?、+、* 和 () 可以在路由路径中使用,并且是它们对应的正则表达式的子集。连字符 (-) 和点 (.) 由基于字符串的路径逐字解释
中间件消费者
MiddlewareConsumer 是一个辅助类。它提供了几种内置的方法来管理中间件。所有这些都可以简单地链接在 流畅的风格 中。forRoutes() 方法可以接受单个字符串、多个字符串、一个 RouteInfo 对象、一个控制器类甚至多个控制器类。在大多数情况下,你可能只会传递以逗号分隔的控制器列表。以下是单个控制器的示例
import { MiddlewareConsumer, Module, NestModule, RequestMethod } from '@nestjs/common';
import { AppController } from './app.controller';
import { AppService } from './app.service';
// 引入中间件文件
import { LoggerMiddleware } from './logger.middleware';

@Module({
  imports: [],
  controllers: [AppController],
  providers: [AppService],
})
export class AppModule implements NestModule {
  configure(consumer: MiddlewareConsumer) {
    consumer
      .apply(LoggerMiddleware)
      //这里引入AppController 控制器,这样访问AppController里面的所有请求中间件都会走
      .forRoutes(AppController);
  }
}
排除路由
有时我们希望排除某些路由应用中间件。我们可以使用 exclude() 方法轻松排除某些路由。此方法可以采用单个字符串、多个字符串或 RouteInfo 对象标识要排除的路由,如下所示
consumer
  .apply(LoggerMiddleware)
  .exclude(
    { path: 'cats', method: RequestMethod.GET },
    { path: 'cats', method: RequestMethod.POST },
    'cats/(.*)',
  )
.forRoutes(AppController);注意:exclude() 方法使用 path-to-regexp 包支持通配符参数。
在上面的示例中,LoggerMiddleware 将绑定到 AppController 内部定义的所有路由,除了传递给 exclude() 方法的三个路由之外。
功能中间件
我们一直使用的 LoggerMiddleware 类非常简单。它没有成员,没有额外的方法,也没有依赖。为什么我们不能用一个简单的函数而不是一个类来定义它呢?事实上,我们可以。这种类型的中间件称为函数式中间件。让我们将日志器中间件从基于类的中间件转换为函数式中间件来说明差异
// logger.middleware.ts
import { Request, Response, NextFunction } from 'express';
// 基于class类的中间件转换成使用function 函数方式的中间件
export function logger(req: Request, res: Response, next: NextFunction) {
  console.log(`Request...`);
  next();
};
并在 AppModule 中使用它
consumer
  .apply(logger)
  .forRoutes(AppController);
提示:当你的中间件不需要任何依赖时,请考虑使用更简单的功能中间件替代方案
多个中间件
如上所述,为了绑定顺序执行的多个中间件,只需在 apply() 方法中提供一个逗号分隔的列表
consumer.apply(cors(), helmet(), logger).forRoutes(AppController);全局中间件
如果我们想一次将中间件绑定到每个已注册的路由,我们可以使用 INestApplication 实例提供的 use() 方法:
注意:全局中间件只能使用函数式的中间件
// logger.middleware.ts
// 基于class类的中间件转换成使用function 函数方式的中间件
export function logger(req: Request, res: Response, next: NextFunction) {
  console.log(`Request...`);
  next();
};
在 main.ts中引入中间件
import { NestFactory } from '@nestjs/core';
import { AppModule } from './app.module';
import { logger } from './logger.middleware';

async function bootstrap() {
  const app = await NestFactory.create(AppModule);
  app.use(logger)
  await app.listen(process.env.PORT ?? 3000);
}
bootstrap();
注意
无法访问全局中间件中的 DI 容器。使用 app.use() 时可以使用 功能中间件。或者,你可以使用类中间件并在 AppModule(或任何其他模块)中将其与 .forRoutes('*') 一起使用。
全局拦截白名单
注意全局中间件只能使用函数模式 案例可以做白名单拦截之类的
import { NestFactory } from '@nestjs/core';
import { AppModule } from './app.module';


const whiteList = ['/list']

function middleWareAll  (req,res,next) {

     console.log(req.originalUrl,'我收全局的')

     if(whiteList.includes(req.originalUrl)){
         next()
     }else{
         res.send('小黑子露出鸡脚了吧')
     }
}

async function bootstrap() {
  const app = await NestFactory.create(AppModule);
  app.use(middleWareAll)
  await app.listen(3000);
}
bootstrap();
中间件 cors处理跨域
npm install cors

npm install @types/cors -D
import { NestFactory } from '@nestjs/core';
import { AppModule } from './app.module';
import * as cors from 'cors'
const whiteList = ['/list']
function middleWareAll (req,res,next) {
console.log(req.originalUrl,'我收全局的')
if(whiteList.includes(req.originalUrl)){
next()
}else{
res.send({code:200})
}
}
async function bootstrap() {
const app = await NestFactory.create(AppModule);
app.use(cors(
origin: '<http://my-mobile-app.com>',
// 更多的配置选项...
))
app.use(middleWareAll)
await app.listen(3000);
}
bootstrap();注意事项
- 1、安全性:在配置CORS时,不推荐使用通配符()来允许所有来源,因为这可能会使你的应用更容易受到跨站请求伪造(CSRF)或其他攻击。
- 2、环境配置:实际项目中,不同的环境(开发、测试、生产)可能需要不同的CORS设置。推荐将CORS设置存储在环境变量中,并根据当前的运行环境载入
app.enableCors({
  origin: process.env.CORS_ORIGIN || '*', // 生产环境应指定具体的域名
  methods: process.env.CORS_METHODS || 'GET,HEAD,PUT,PATCH,POST,DELETE',
  allowedHeaders: process.env.CORS_HEADERS || 'Content-Type, Accept',
  credentials: process.env.CORS_CREDENTIALS === 'true', // 请确保实际字符串值是'true'或者'false'
});
一旦你配置了CORS,确保你进行了适当的测试,包括从不同的源发起请求,确保配置按预期工作
具体案例
假设你建立了一个 NestJS 项目,它提供了一些API给移动应用使用,而这个移动应用托管在 http://my-mobile-app.com上。为了允许这个移动应用访问API,我们需要来配置CORS,允许此来源的请求。
在你的 main.ts文件中,你可以如以下方式配置
import { NestFactory } from '@nestjs/core';
import { AppModule } from './app.module';

async function bootstrap() {
  const app = await NestFactory.create(AppModule, {
    cors: {
      origin: '<http://my-mobile-app.com>', // 只有这个移动应用可以访问
      methods: 'GET,POST', // 只允许GET和POST请求
      credentials: true, // 允许携带凭证信息
    },
  });

  await app.listen(3000);
}
bootstrap();通过这种方式,我们确保了只有那个特定的移动应用能够访问NestJs服务,并只能通过GET和POST方法。同时,我们也选择接受来自该应用的Cookies或其他认证相关的信息。